
Technology advances are driving Printing industry like never before. And thus Booklet and Catalog printing are the services in high demand.
It takes months of efforts to create an idea and put it into words. But the actual journey of how your words will look on Paper starts when it is ready to be printed. You are not sure if it will look exactly the way you dreamt it to be?
Well, here’s a guide to assist you on What and How to bring out the best design out of print for your next project.
Whether it is a Catalogues, Magazines, Brochures or Comic books or any content you decide to print together which has a bunch of pages ranging from 4 to 64 is technically called a Booklet!
It is essential to create a document that is functional and appealing. Here’s everything you need to know before you settle for nothing but the Best!
So let’s begin!
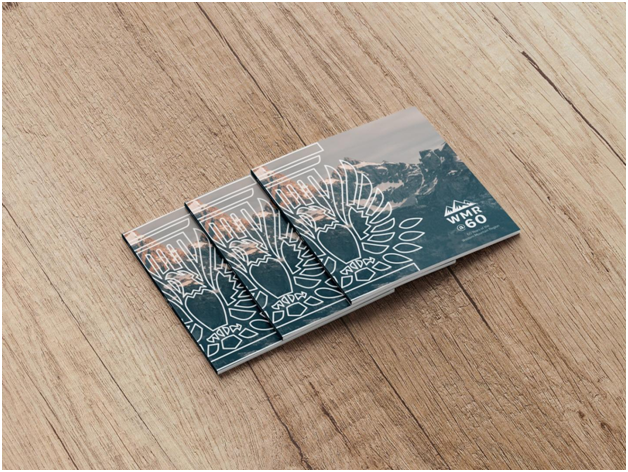
COVER
The first impression is the last impression so make it count. Your catalog cover will serve as a first impression of the contents inside. While deciding a Cover for the book the basic things in mind should be –
- Diameters: The quality of the cover decides the safety of the pages inside. Thick gsm papers help to protect and hold the pages tight. Thick covers also give a Professional classy, luxurious touch to your booklet. The key factor while for choosing the right catalog size depends on how much information the booklet carries.
- Quality: Picking up the right quality material make a huge impact on the final product. We can select from Silk, Gloss, Dull/Mate and aqueous/UV coating to provide protection. The paper we use must be of high quality and good value.
LAMINATION
Another great way to further improve the quality and appearance of a book is to bond a clear plastic film onto the book’s cover.
Laminate film is available in a variety of choices, with the most popular being silk, matte and gloss laminate
There are types of Laminations and they’re –
- Silk Lamination: By coating ordinary paper with a layer of plastic in order to make it stronger, more desirable and more resilient. The finish is smooth and natural-looking
- Matt Lamination: Matt lamination gives a stylish, polished and sophisticated finish to the cover. The texture of a matt laminate is velvety, which makes it a pleasant and easy to handle for users.
- Gloss Lamination: it makes writing and pictures printed on the cover appear more clear and sharper. If the cover surface come in contact with dirt, it is can be easily wiped clean due to its smooth, glossy and shiny texture.
Laminations don’t stick to uncoated paper and hence we suggest using coated paper for covers so as to make them durable and presentable.
In addition to giving the book an impressive look and feel, the laminate film adds a protective barrier to increase stain resistance and durability. This helps extend the life of the book.
PAPER
Choosing right paper for your catalogue or booklet is very important as it decides how writing and pictures will look after finish.
The types of Paper that can be used are:
- Gloss coated paper
Gloss paper has a high shine. As the ink dries well there is no need for a seal varnish as the ink does not rub off.
- Matt coated paper
Matt paper is coated with a matt finish to produce a paper that isn’t shiny, preventing glare.
- Silk coated paper
The interim between gloss and matt, silk coated paper has a smooth silky coating, leaving it smooth to the touch but without the shine of glass paper. This type of paper can be used for many things such as magazines, books and catalogues.
- 4. Watermarked paper
Used in high quality paper watermarked paper give a feel of luxury and high quality.
BINDING
Binding is not just a fastener that holds a catalog or booklet together but more than that. While choosing the binding we need to focus on durability. It has to be easy to handle and read.
Here are the 3 main types of Binding –
- Saddle Stitch
It is the most used binding method. Folded catalog pages are placed, or “saddled” on equipment and then stapled together at the center fold. Saddle stitching is mostly used for the catalogs that have 4 to 70 pages.
- Perfect binding
In this pages are properly attached to one another using an adhesive giving a look like a squared-off spine. Perfect binding is best suited to catalogs that have more than 40 pages.
- Square back binding
In this binding the pages are bonded first with two staples along the center fold. Then pressure is applied to the spine to create a squared-off look. Square back binding is suitable for projects of 25-120 pages.
- Spiral or coil binding
In this black or colored plastics coils are used which also gives the booklets and catalogues a professional and sophisticated look. Coil binding is best for pages ranging from 4.25 x 4.25 inches to 12 x 14 inches.
- Wire-O binding
In this binding C-shaped wires are threaded into holes along the edges of the pages, creating an attractive and strong binding. It comes in a variety of colors and is suitable for booklets of 350 pages.
Ready to print
As the technology has advanced many new modern printing techniques and machines are now into use and thus the chances of errors occurring are very less.
Once we have finalised the cover paper lamination and binding for our project the next important step is printing the project.
Some common issues that prevents a file from being print ready
- The size of the document has not been set properly.
- Colors specifications are not set; e.g. Colors are set to RGB instead of CMYK.
- No proper spacing between Text and images and the borders of the page. According to the rule content has to be at least 5mm away from the trimmed edge.
- Resolution and size of images and designs are not high resolution. Preferred resolution is minimum of 300ppi at size should be 100%.
- Bleed is not set correctly. Artwork should extend at least 2mm past crop marks.
- Crop marks are placed incorrectly or is either missing.
- Poor contrast between text and background
- Spelling and grammar errors.
- Document is supplied in the wrong formats. High-resolution Adobe PDF file are universally accepted.
Points to remember for creating Print Ready files
High Resolution
- Always send the file for printing with Highest Resolution possible.
- If the resolution is low the files produced are of poor quality and there is loss of time and money.
- The resolution of the images should be around 300 DPI or higher.
File Type
- Adobe PDF files have high resolution and hence are accepted universally by almost all commercial printers.
- Files created using Adobe Products like Photoshop, Illustrator or InDesign are also accepted by commercial printers.
- Whereas, files created using Microsoft programs such as Word, PowerPoint require some sort of conversion and intervention to become print-ready.
CMK not RGB
- Our computers use color space called RGB whereas a printing press uses Color space called CMYK.
- While sending files to a commercial printer it has to be in CMYK format.
- The Printing press uses CMYK to produce colors using the ink of fourcolors : cyan, magenta, yellow and black.
Image Formats
- PNG and TIFF images work the best for most print projects.
- While sharing files for printing the images should be in the highest quality format possible.
Adam Smith is a marketing director at Mixam who loves to motivate entrepreneurs and startup holders. He writes for magazines and blogs on topics pertaining to leadership and success. While not at work, he is either on vacation or binge-watching series on Netflix